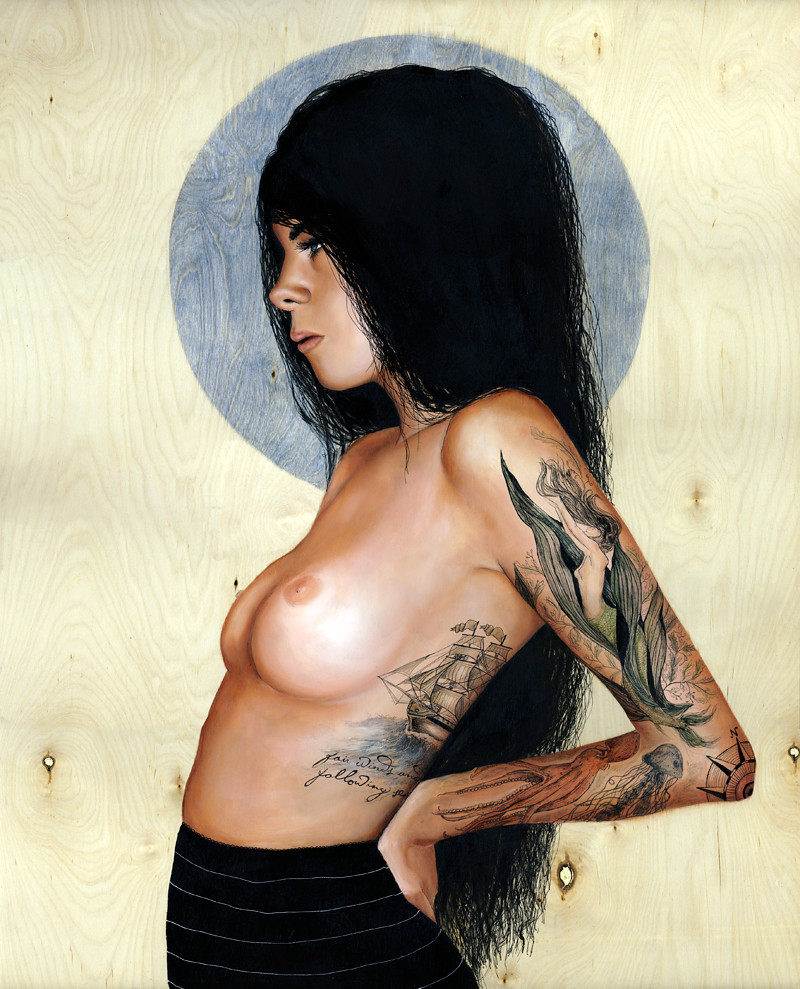
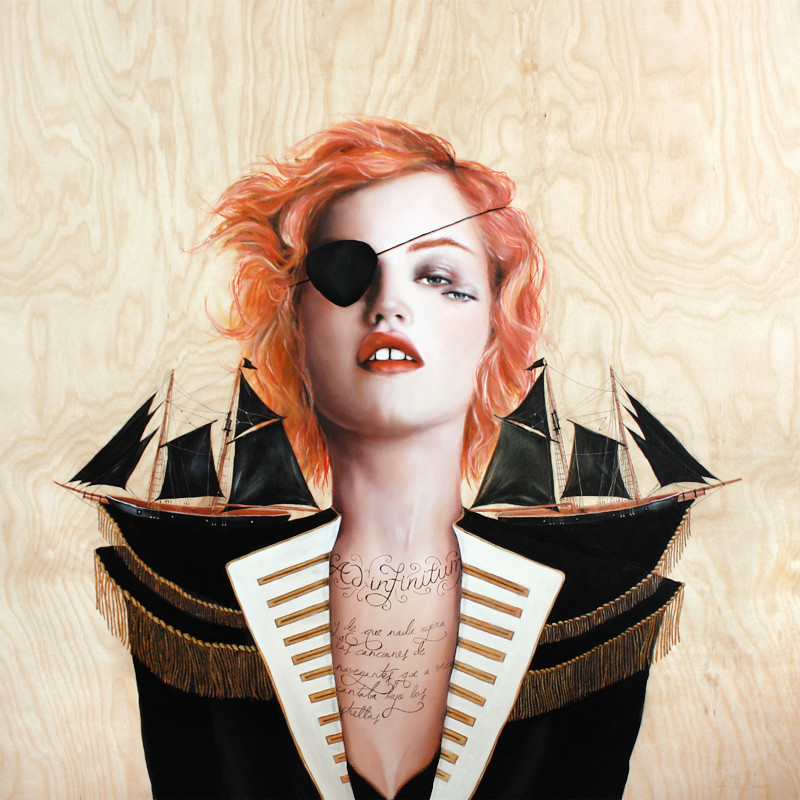
Behold! The tan-lined, tattooed, sleepy-eyed dame.
And now it's time for round two of long and detailed process explanations.

Alright. So this time around I tried out some things differently. A lot of people have been asking me if I use a primer on the wood or some sort of gesso. I haven't in the past, but this time I did. The problem you run in to when choosing a primer is that it's generally white and very opaque. I like to leave the wood exposed around the figure, so a white gesso just wouldn't do. And it's terribly limiting to only apply it where you think paint is going to be. I'd feel very trapped if that were the case. Then this
lovely lady reccomended a product to me, something to add a barrier between the woodgrain and the paint. Ladies and gentleman, I give you GAC 100! It's white in the bottle but dries perfectly clear! Now, I must say, it definitely did the trick in making the wood more vibrant and not so sponge-like. It also did make it much more forgiving if a drop of paint landed where it shouldn't have. (A little bit of mineral spirits picked it right up.) Since it's like adding a thin coating of plasticy substance to the wood, the paint handles very differently. I found it a little more difficult to work the skin how I normally do, but it made doing the hair really easy as well as the halo. I personally prefer to paint directly on to the wood when rendering skin, but the hair was so easy to do on top of the primer, as it stopped the india ink from bleeding through the grain. So, for the next piece I'm doing, I applied the primer to everywhere but the skin portion. (More details on that later, but I definitely prefer doing it this way)
-
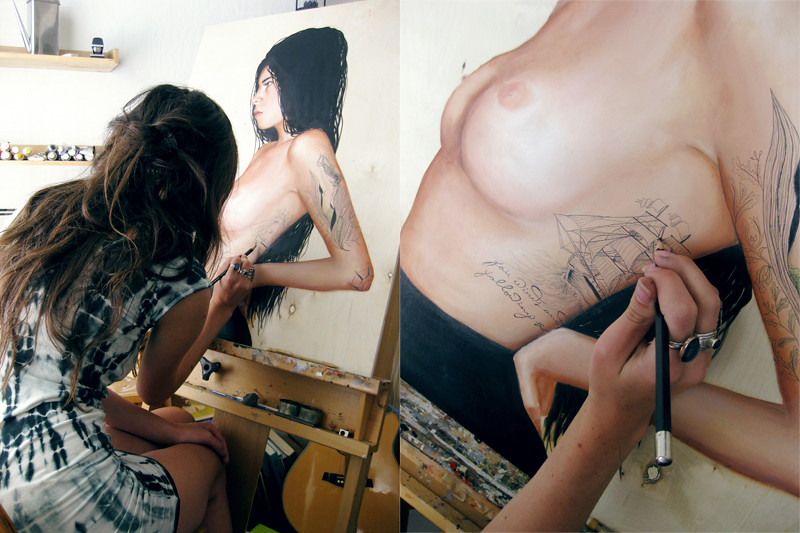
Here she is at the start. I start filling in the pencil sketch with the basic pattern of light and shadows. From there I keep layering and layering until I'm satisfied.


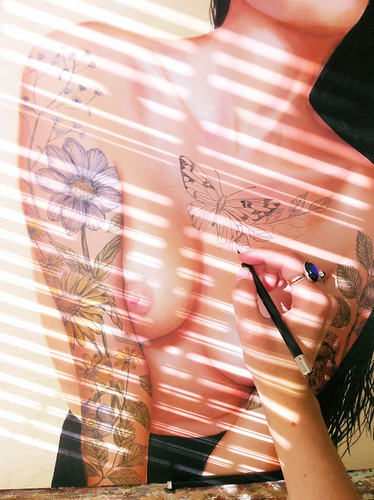
Here I am drawing little houses. I know, weird, who paints in little dresses? I seriously do. Somehow I manage to get paint on everything but my clothes.. some strange skill I have acquired somewhere. I usually end up with bits of red or black paint on my face instead.
I also introduced a few new colors in to my palette which was fun, Rose Portrait and Mars Red (which is basically a Burnt Umber with some red hues).
--
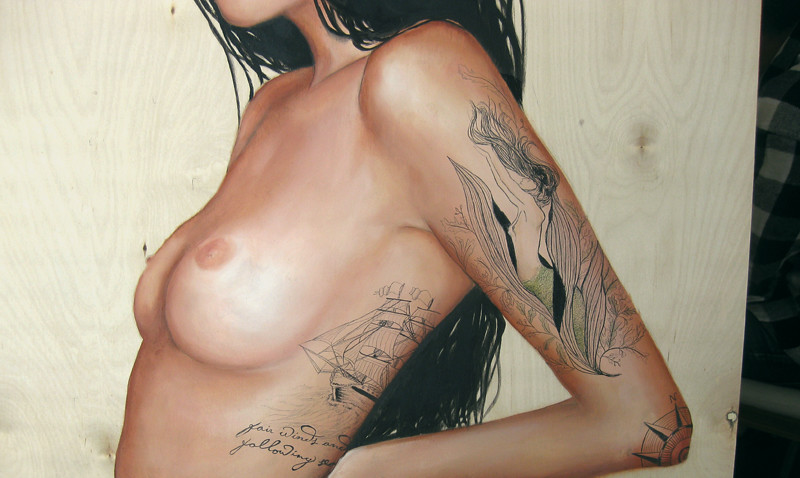
A sleeve of Victorian houses, my homage to San Francisco.

As stated in my previous post, the words say "
thy eternal summer shall not fade", a snippet of Shakespeare's sonnet XVIII. This particular sonnet is so very special to me. In the 6th grade my grammar teacher taught this sonnet to us, we all had to memorize it and later recite it in front of the the class. I remember repeating it over and over for my mom, nervously trying to remember all the strange words. She would always tell me slow down, to speak it as if someone was writing it. I still have it memorized, as do my two best friends Lizzy and
Morgan. It's this funny little connection we all have to eachother. I've always loved Mrs. Motgomery for making us memorize it, even if I didn't really understand it at the time. Now I find it to be so beautiful..
Here it is in full length:
Shall I compare thee to a summer's day?
Thou art more lovely and more temperate:
Rough winds do shake the darling buds of May,
And summer's lease hath all too short a date:
Sometime too hot the eye of heaven shines,
And often is his gold complexion dimm'd;
And every fair from fair sometime declines,
By chance or nature's changing course untrimm'd;
But thy eternal summer shall not fade
Nor lose possession of that fair thou owest;
Nor shall Death brag thou wander'st in his shade,
When in eternal lines to time thou growest:
So long as men can breathe or eyes can see,
So long lives this and this gives life to thee.
--
For the halo, I mixed gold paint and bleached linseed oil, it made it nice and glossy.

--

As for the tattoo above, it's an outlin
e of a world map, and a famous French quote that I adore.
"Il n'est rien de réel que le rêve et l'amour."
//
"Nothing is real but dreams and love"
(which pretty much sums me up entirely)
Alright, I'm starting to get all sentimental and shit. So it's time to wrap this up.
Once the piece is done and dry, I start the scan. My scanner bed is only 8.5" x 11", so it definitely takes a lot of scans to capture the whole image. Someday I'll invest in a larger scanner, but for now, this works. Here you can see the ridiculous amount of layers already, and that's only half the image. It's very tedious but definitely worth getting a high DPI image of it.

Also, the sound of my scanner drives my kitten nuts, it's a hilarious sight.
Think that's about it. Thanks for reading! As usual, I'm happy to answer any questions you may have. I am always experimenting and learning as I go, but I'm happy to share my discoveries with you.
xoxoxo
C


